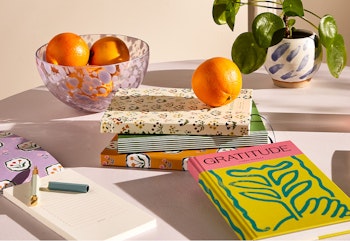
Our Caravan collection was created as an antidote to the daily digital overload of modern life, looking to the slower pace of life in the English countryside for inspiration. The collection is about taking a moment to pause, embracing the simpler life and making every day special. In trying to capture the spirit of a wagon winding along through the woods, our designers practised artisanal crafts that helped shape their designs. From quilting to woodblock printing, these creative and mindful pursuits can help transport you to your own countryside escape. We’ve gathered a few of our favourite techniques that will make you slow down, get cosy and create a little joy.
Woodblock and linocut printing
You’ll need:
– Wood or lino
– Pencil
– Chisel or carving gouges
– Ink (oil or water) and a piece of glass (such as from a photo frame)
– Roller
– Spoon
– Blank paper
Woodblock printing is an ancient technique first found in China that was often used to make book pages and images. A similar process is lino printing, made popular by German Expressionists. Start by sketching out a simple design in a notebook – we love printing woodland animals or a favourite flower. Not sure what to print? Try copying our Pony Tales design. Once you’re happy with your sketch, you can either transfer it (place the image pencil-side down and rub firmly) or copy it onto the piece of wood or lino. Go over the illustration with pen so it’s easier to see, then start carving out negative space – any areas that are untouched by pen ink.
Be careful to always cut away from your body, keeping your fingers firmly out of the way. The illustrated section should then be raised, with the other parts of wood or lino gouged out. Pop your ink onto the glass piece, then move the roller across the glass to pick up ink. Roll the ink onto your print. If there is ink in places you don’t want, feel free to go back to carving. Transfer your design onto paper by pressing it with the back of a spoon. Remember, every print will be different, and any unique elements will make your art even more special.
Patchwork quilting
You’ll need:
– Fabric squares for front of quilt, a larger piece of fabric for backing
– Pins
– Batting (to make the inner, soft layer of the quilt)
– Sewing machine and needle and thread
– Ruler
– Rotary cutter
Patchwork quilting is a wonderful way to reinvigorate old fabrics, stitching them together to create something beautiful. The first step is to gather enough fabric for your quilt. Go through your closet and pick out old clothes, use any old sheets or tea towels, or head to a fabric store for fat quarters (packs of pre-cut squares from the ends of fabric rolls). Draw out a plan in your notebook – we love a simple square pattern like our Harlequin Check design – and cut and measure all your pieces accordingly.
Start hand stitching your squares together until you have a row, then stitch the rows together. Once you’re happy with your pattern, lay down your big piece of fabric backing, followed by your batting layer, and the quilting pattern piece on top. Pin the pieces together, then stitch a design along the lines of your squares using your sewing machine. When you’re finished, you’ll have a beautiful and cosy quilt that will keep you warm for many winters.
Embroidery
You’ll need:
– Fabric (muslin, cotton, linen or whatever you’d like to embroider)
– Embroidery hoop
– Water soluble pen
– Needles
– Embroidery thread/floss
– Scissors
Begin by cutting a square of fabric slightly bigger than your embroidery hoop, then place the fabric taut in your hoop. Use the water soluble pen to draw a design onto the fabric – you could create a phrase, a pattern, an image or a delicate floral design like the one on The Herbarium. Then, simply thread your embroidery floss through your needle and start stitching.
There are many different forms of embroidery stitching, but a simple running stitch is the simplest option – moving your needle up and down through the fabric, varying the spacing between stitches for different effects. The backstitch, french knot, split stitch and satin stitch are other popular embroidery methods that you may want to learn as you become more familiar with the technique.
Dried flower pressing
You’ll need:
– Flowers
– Newspaper, coffee filters or tissues
– A book or two
Preserve flowers from a special bouquet or treasured spring day using this simple technique. If picking from your garden, remember that the best time to harvest blooms is at least mid-morning, after the dew from dawn has dried. Flora that sits flat easily – such as daisies, violets, roses and most leaves – are the easiest to press. If your flowers have prominent pollen, you may want to remove it, as this can stain the other petals.
Open your book (any of our notebooks, daily planners or journals would work well) and place the newspaper, coffee filters or tissues down to help dry out the flowers quicker. Close the book and weigh it down with a brick, other books or another heavy item. Leave it alone for about a week, then remove the absorbent layers and replace them. It should take two - three weeks for the flowers to dry fully. Once they’re dry, they can be glued to paper and placed in a frame, used in a collage, or popped into a card for a spring surprise.
To see stationery with peaceful crafts and natural motifs at its heart, discover our Caravan collection.


